How to Add an Email Alias in Microsoft 365 (Office 365) –
An email alias is an additional email address that delivers messages to the user’s existing mailbox. Users can receive emails sent to either their primary email address or their alias without needing a separate mailbox or license.
Example:
- Primary email:
john.smith@company.com - Additional alias:
jsmith@company.com - Both addresses deliver email to the same mailbox.
Instructions: Adding an email alias
Step 1: Sign in to the Microsoft 365 Admin Center
- Open your web browser.
- Navigate to https://admin.microsoft.com .
- Sign in using an account with the appropriate administrator permissions.
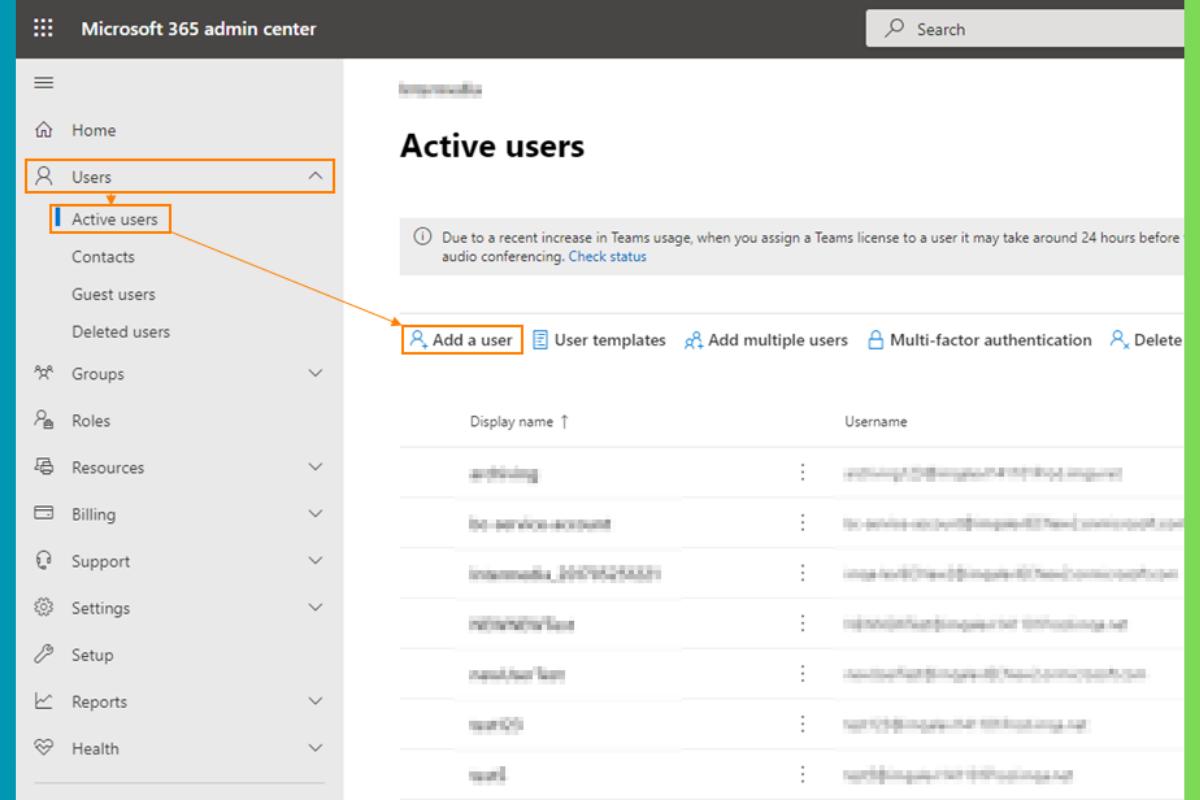
Step 2: Navigate to Active Users
- From the left-hand navigation menu, select Users.
- Select Active users.
- Locate the employee whose mailbox needs an additional email alias.
- Click the employee’s name to open their account details.
Step 3: Open Username and Email Settings
- In the user’s account details panel, locate the Aliases section.
- Select Manage username and email.
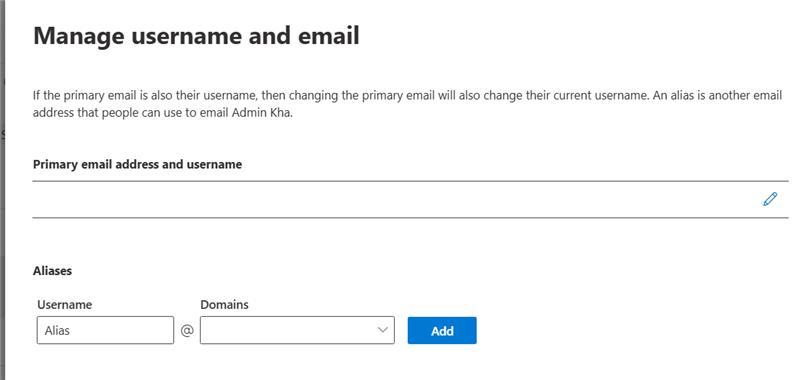
Step 4: Add the New Email Alias
- Locate the Username field.
- Enter the new email alias you want to create.
- Select the appropriate email domain from the dropdown menu.
- Click Add.
Example:
| Field | Example |
|---|---|
| Username | jsmith |
| Domain | company.com |
| New alias | jsmith@company.com |
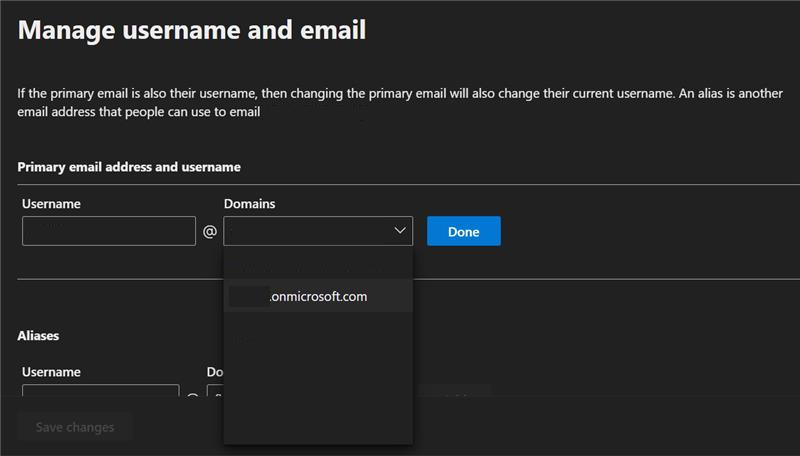
Step 5: Save Changes
- Verify the new alias appears in the list.
- Confirm the email address is spelled correctly.
- Click Save changes.
- Allow time for the changes to propagate throughout Microsoft 365. This can take up to 24 hours.
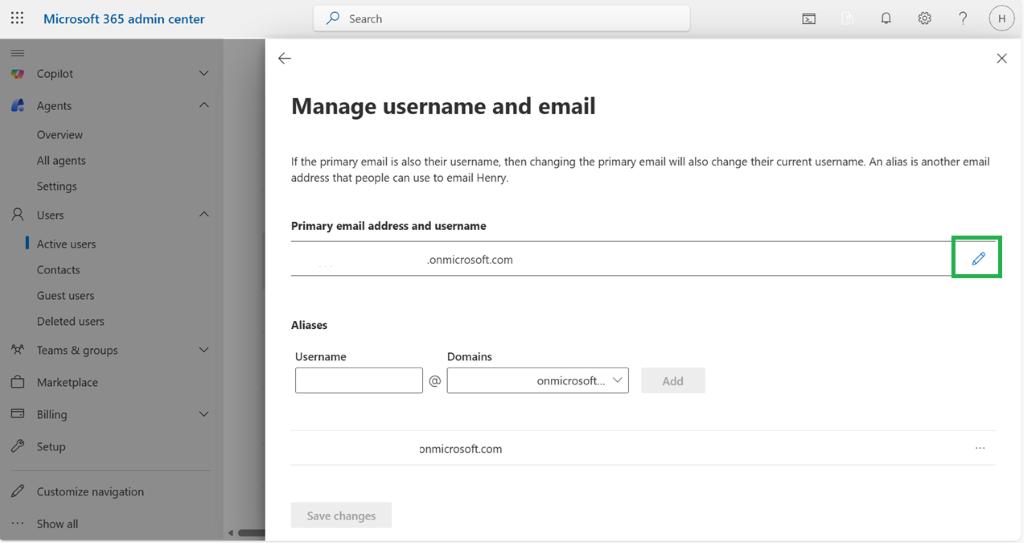
Step 6: Verify the New Alias
- Open Outlook or Outlook on the web.
- Send a test email to the newly created alias.
- Confirm the message arrives in the user’s existing inbox.
- Confirm the original email address continues to receive messages.
Completed
The user can now receive email sent to both their primary email address and their new alias.
Important Notes
- An alias does not create a separate mailbox.
- An alias does not require an additional Microsoft 365 license.
- Microsoft 365 supports up to 400 aliases per user.
- The user can receive email at both addresses in the same inbox.
- Adding an alias does not automatically mean the user can send email from that alias.
- The account must have the appropriate licensing and administrator permissions.